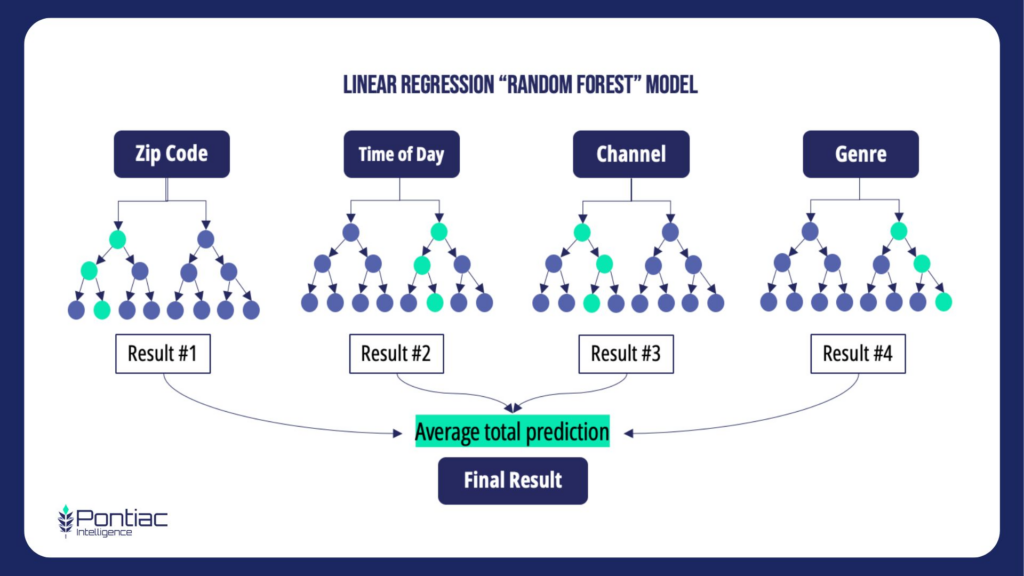
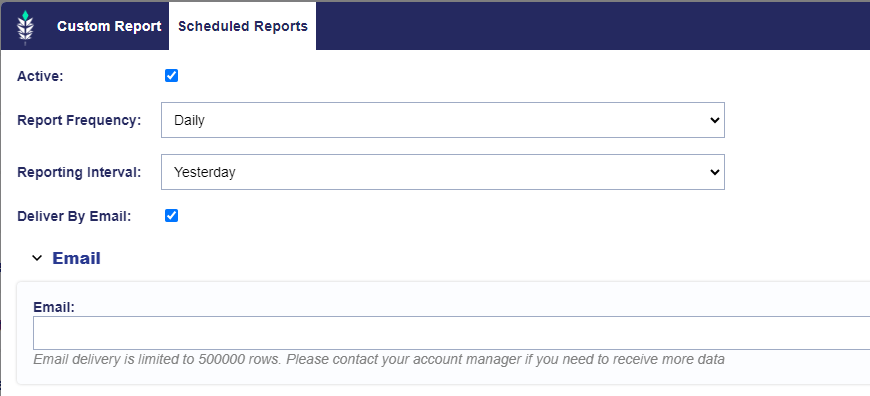
Bid Metrics & Troubleshooting Delivery
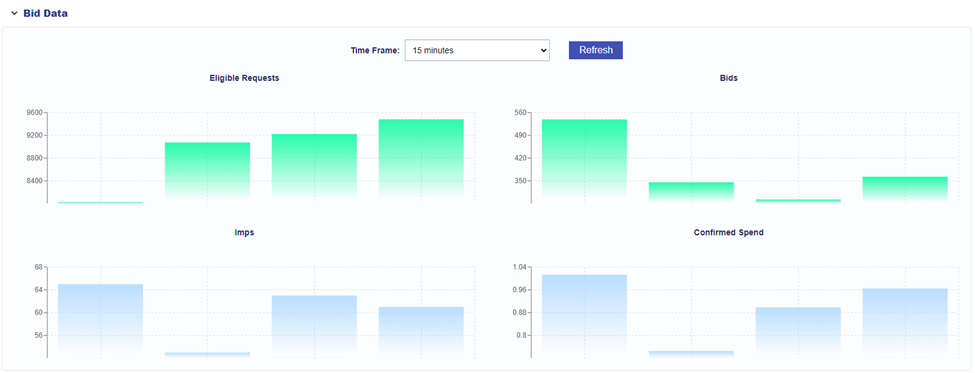
Bid Metrics:
Bid metrics are displayed on both the Campaign details and the Line details to provide insight into the bid funnel, real time delivery and any issues that may need to be addressed.
- Eligible Requests: Bid requests or impressions that meet the targeting criteria for the Line or Campaign. This considers parameters in the ‘Targeting’ section – deals, geo, inventory targeting lists etc. If you are not seeing any eligible requests, your targeting may not be feasible if there are no impressions that meet all of the selected criteria. See the below section on troubleshooting delivery for more information.
- Bids: Bids placed on eligible impressions. If your Line or Campaign has eligible impressions, but is not bidding there may be additional requirements blocking the bids from being placed. See the below section on troubleshooting delivery for more information.
- Imps: Bids won, the number of confirmed impressions served by the Line or Campaign in the selected time frame.
- Confirmed Spend: Confirmed dollars spent by the Line or Campaign in the selected time frame.
Troubleshooting Delivery Issues
1 ) Are there any eligible requests? If no, here are some steps to troubleshoot the lack of eligible requests:
- Check the creative audit status on your ads, this can be seen in the Advertiser screen next to the creative ID.
- If the status is ‘pending’ (yellow caution symbol) there cannot be eligible requests until your ads are audited by the Pontiac audit team. Keep in mind that the audit process may take up to one business day.
- If your creative is rejected, it will not be able to serve on the Pontiac platform. Review our creative acceptance policy for more information on prohibited content.
- Run an inventory availability report with the selected targeting parameters applied. If there are no estimated daily impressions available or the estimate is very low, your targeting may be too restrictive and should be expanded to find eligible impressions that meet your requirements.
- Check your campaign & line set ups to verify that there are no conflicting targeting parameters. For example, if the campaign was set to target the state of Florida and the line set to target the state of Alabama, the line would not be able to serve. An impression must meet the targeting criteria of both the line and campaign to be eligible.
- Check sample logs on the deal for publisher b-cats and any specific creative requirements such as duration, bitrate, etc. Verify that your creative meets all platform and publisher specs.
- If you have content level targeting lists applied, check the deal sample logs to verify that these values are correctly formatted and in the correct field. Values in these lists will need to be exact matches to the values in the bid request (except for capitalization).
- If you have ‘Require X’ applied on content level fields (require network, require channel, etc), check the deal sample logs for the deals targeted to see if they are passing values in these fields. If they are not populating these fields, you will need to select other deals that pass this info, or remove this setting from targets.
- Check the deals table in the ‘Inventory’ tab for the ‘last served’ date on the deals being used. If this date is not current, it is possible the deal has expired, but has not yet been removed from the system. Reach out via the Help Center for assistance with this deal.
2 ) If there are eligible requests, are there bids being placed? If no, here are some steps to troubleshoot the lack of bids:
- Check deals table for ‘publisher approval’ required column. If the deal requires approval, you will need to submit a request via the Help Center to start the approval process for that deal. Once your creative is approved, this will appear below the creative preview in the section ‘Approved for: ‘ with the publisher name. You can find more info on this here: Publisher Specs & Approval Processes
- Check for ‘sensitive categories allowed’ on the targeted deals if your creative has been flagged as sensitive. These creatives will only be eligible to run on deals that have explicitly been marked this category as accepted. You can find more information on this here: Sensitive Creatives
- Reach out through the Help Center for further technical assistance if you try the above recommendations and are still not seeing bids on eligible impressions.
3 ) If there are bids being placed, are there impressions being won? If no, here are some steps to troubleshoot the lack of wins:
- Remove bid at floor price – if you are bidding higher than the floor but have this feature enabled, you will only be bidding at the floor and may be missing out on impressions that could’ve been winning with your max bid.
- If you do not have ‘bid at price floor’ applied, you may still want to test incremental increases in the bid to see if more impressions can be won at a higher price point.
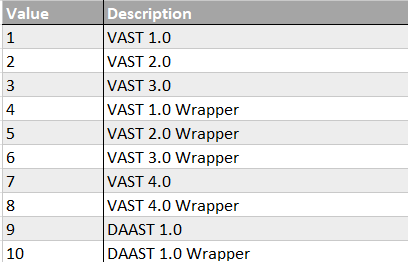
- The publishers targeted may have additional specs or creative requirements that are blocking your creatives from serving. In most cases the specs can be found on the publishers website, the sample logs on the CTV landscape report also provide insight into requirements such as bit rates, video protocol (vast version) & more.
- Reach out out through the Help Center for further technical assistance if you have tried the above recommendations and are still unable to see impressions won.
4 ) If there are impressions being won, but the line or campaign is not meeting expectations for delivery, the following are suggestions to increase scale:
- Increase the budget multiplier
- Apply ‘catch up ASAP’ in the Pacing section
- Increase frequency caps
- A low win rate is most likely due to the bid on the Line, test incremental increases to see how this affects Line delivery.
- Run an inventory availability report with the selected targeting parameters applied. If there are no estimated daily impressions available or the estimate is very low, your targeting may need to be expanded to allow the line to serve. Can you add additional inventory, expand the geo or audience size, etc? The inventory availability report will also provide insight into the bid floors across the inventory within a deal, geo etc.